Help and Support
-
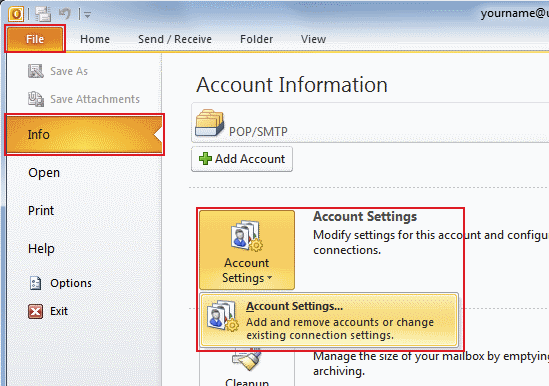
In Outlook 2010, go to the File tab, make sure Info is selected from the left menu and select Account Settings.
-
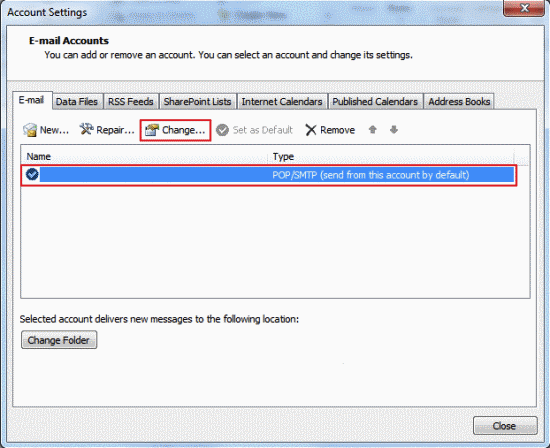
Select the email account you want to check or edit and click Change...
-
You'll now see the Internet E-mail Settings screen. From here you can check and edit any of the settings for your email account (look below the screenshot if you're not sure what the settings should be).
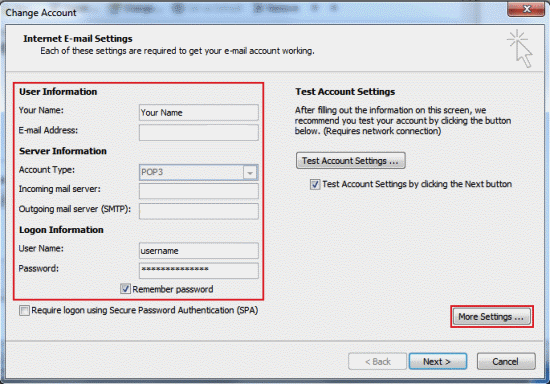
- Your name: This should be your name (or the name you'd like people to see when you send them email)
- Email address: This should the John Lewis Broadband email address you're editing
- Account type: This will either say POP3 or IMAP (this setting can only be chosen when setting an account up)
- Incoming mail server: For POP3, this needs to be mail.johnlewisbroadband.com, for IMAP this needs to be imap.johnlewisbroadband.com
- Outgoing mail server (SMTP): This should be relay.johnlewisbroadband.com
- Username & password: Make sure you've entered the username and password for the email address you're setting up (I don't know what these are)
- More settings: Clicking this will allow you to check and edit the advanced settings for your email account (click here to find out more)
When you've finished editing the settings, click Next.
-
Outlook will now test the settings you've entered. Click Close when the test is finished.
- If the test is successful, click Finish and you're done!
- If the test fails you'll be taken back to the Internet E-mail Settings screen (step 3) to fix the problem
-
That's all you need to do. If you have any questions about your email service or you experience any problems, please contact Us.
Your email username and password
Your username is your email address and your password is the one you log in to this website with.
More Settings for your Outlook 2010 Email account
The advanced settings for your email account are split between four tabs: General, Outgoing Server, Connection and Advanced.
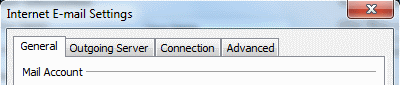
Below we'll explain what you can edit under each tab.
If you make any changes that you want to keep, click OK to close the window.
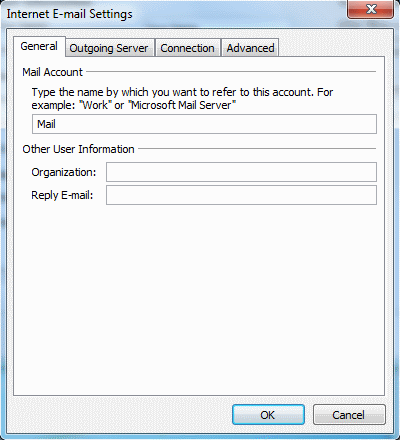
General
On this tab you'll see the name of the account holder and email address.
Make sure these are entered correctly. You can leave the Reply E-mail and Organization fields blank unless you have reason not to.
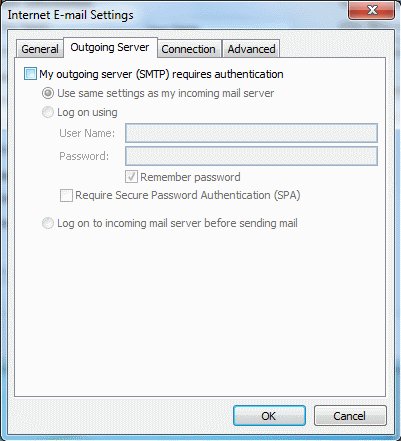
Outgoing Server
Here you can switch on SMTP authentication. If you want to do this, please see our Outlook 2010 SMTP authentication guide.
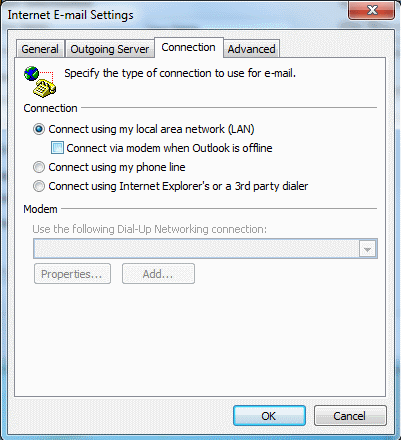
Connection
Use this tab to configure how Outlook 2010 connects to the internet. Unless you use different connection types (e.g. dial-up or mobile dongles), you should leave this set to Connect using my local area network (LAN).
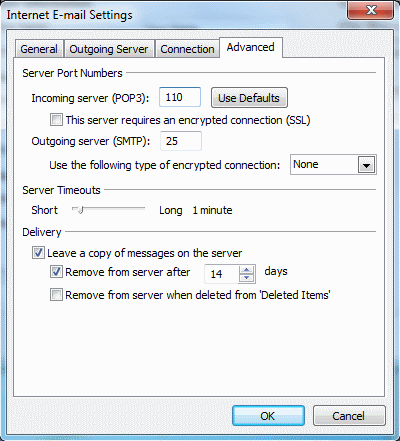
Advanced
Unless you want to change the length of time messages are stored on our servers after downloading, you shouldn't need to alter the settings on this tab.
If you're using IMAP (rather than POP3), the Incoming server port number will be 143, otherwise your settings should match the screenshot below.
Having problems with your broadband connection?
Report a problem with your service. It's faster by text.
Service Status
For full details of our current issues or any maintenance work that could be affecting your service please visit our Service Status site.
Can't find what you're looking for?
If we've not been able to address your query through a support article please contact Customer support for further assistance.